Technical Specification for Injection Molding Sample Test Molds, Stamping Sample Test Molds, and Die Casting Sample Test Molds
Sample test molds are core tools for material performance testing and product process validation. Their structural rationality and precision control directly affect the reliability of test data and production conversion efficiency. Due to differences in molding principles, injection molding, stamping, and die casting sample test molds exhibit distinct characteristics in design logic, process adaptation, and core parameter control, while aligning with the current industry trends of lightweight, high precision, and high efficiency. The following details the core technical points, process adaptation requirements, and application optimization directions of these three types of molds.
I. Injection Molding Sample Test Molds
Based on the molding principle of melt filling, pressure holding, and cooling, injection molding sample test molds are mainly used for preparing test samples of plastics, composite materials, etc., for mechanical performance tests such as tensile, bending, and impact. The core requirements are high dimensional precision, few internal defects, and good performance uniformity of samples.
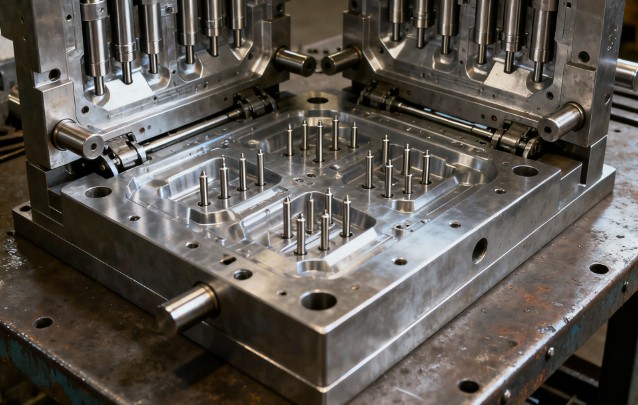
Core Structural DesignThe mold cavity adopts an integral or combined structure, with a surface roughness controlled at Ra 0.2-0.4μm to ensure the sample surface is smooth and burr-free, avoiding impact on mechanical test results. The mainstream cavity count is designed as 1-4 cavities to balance test efficiency and sample consistency. Multi-cavity molds must ensure runner balance, with the dimensional deviation of the gate of each cavity not exceeding 0.02mm. The guiding mechanism uses a guide pillar and bushing combination, with a fit clearance of 0.005-0.01mm to ensure clamping precision. The ejection mechanism preferably adopts an ejector pin or ejector plate type, with uniform ejection speed to avoid sample deformation, and the ejection clearance not greater than 0.015mm.

Key Process Parameter AdaptationThe mold temperature control precision is ±1℃, and temperature control zones are designed according to the material characteristics of the sample. For example, crystalline plastics require a higher cavity temperature (80-120℃), while non-crystalline plastics have a cavity temperature controlled at 40-80℃. The gating system adopts a submarine or side gate design, and the gate size is adjusted according to the sample thickness, usually 1/3-1/2 of the sample thickness to reduce the impact of gate marks on the test. The mold vent groove depth is controlled at 0.01-0.02mm, and the width is 5-10mm to ensure full discharge of gas in the cavity, avoiding defects such as bubbles and material shortage in the sample.
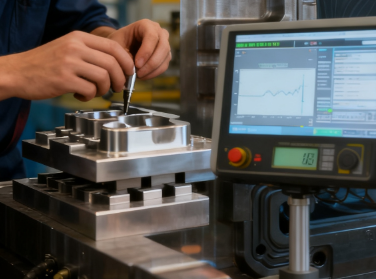
Technical Trends and OptimizationCurrent injection molding sample test molds are developing towards modularization and intelligence. The adoption of standardized mold bases and replaceable cavity designs enables rapid switching of samples of different specifications, with the switching time shortened to within 30 minutes. Integrating real-time monitoring systems for temperature and pressure sensors, the melt pressure (fluctuation range ±5bar) and cavity temperature during the filling process are precisely controlled, improving sample performance stability. Meanwhile, wear-resistant and corrosion-resistant mold steels (such as S136, H13) are used, and the surface hardness reaches HRC 58-62 after nitriding treatment, extending the mold service life to more than 500,000 cycles.
II. Stamping Sample Test Molds
Through cold working processes such as blanking, bending, and stretching, stamping sample test molds prepare standard test samples of metal materials (steel plates, aluminum plates, copper strips, etc.). The core requirements are flat sample edges, high dimensional precision, and no excessive work hardening.

Core Structural DesignThe mold adopts a rigid mold base, with a deformation amount controlled within 0.01mm to ensure precise alignment of the upper and lower molds during stamping. The clearance between the punch and die is adjusted according to the material thickness and mechanical properties, generally 5%-10% of the material thickness. A smaller clearance is used for blanking soft materials (such as aluminum and copper), and a larger clearance for hard materials (such as high-strength steel). The positioning mechanism uses a combination of guide pins and side pressure devices, with a positioning accuracy of ±0.02mm to ensure sample size consistency. The stripping mechanism adopts an elastic stripping plate, with uniform stripping force to avoid scratches on the sample surface.
Key Process Parameter AdaptationThe stamping speed is adjusted according to material characteristics and sample shape, with a conventional range of 10-50 times per minute. For thin materials with a thickness less than 1mm, the stamping speed can be increased to 80 times per minute to ensure rapid material separation and reduce edge burrs (burr height not exceeding 0.03mm). The cutting edges of the punch and die adopt a circular arc transition design, with a fillet radius of 0.1-0.3mm to avoid edge damage and sample edge tearing. The mold guiding precision is controlled at 0.003-0.005mm, ensuring no deviation of the upper and lower molds during stamping through the precise fit of guide pillars and bushings.
Technical Trends and OptimizationThe application of lightweight and high-strength materials drives stamping sample test molds towards high precision and wear resistance. Coating technologies (such as TiN, DLC coatings) are used to treat the surface of punches and dies, increasing the surface hardness to above HV 2000 and improving wear resistance by 3-5 times. Introducing digital twin technology, the stress distribution during the stamping process is simulated to optimize the mold structure design, reducing the sample work hardening area (hardened layer depth controlled within 0.1mm). Meanwhile, multi-functional integrated molds are developed, integrating blanking, bending, stretching and other processes to realize one-time forming of complex-shaped test samples, improving production efficiency by more than 40%.

III. Die Casting Sample Test Molds
Die casting sample test molds inject molten metal (aluminum alloy, zinc alloy, magnesium alloy, etc.) into the cavity at high pressure and speed to prepare test samples for mechanical performance testing of metal materials. The core requirements are dense sample structure, no pores, shrinkage holes and other defects, and dimensional precision meeting test standards.
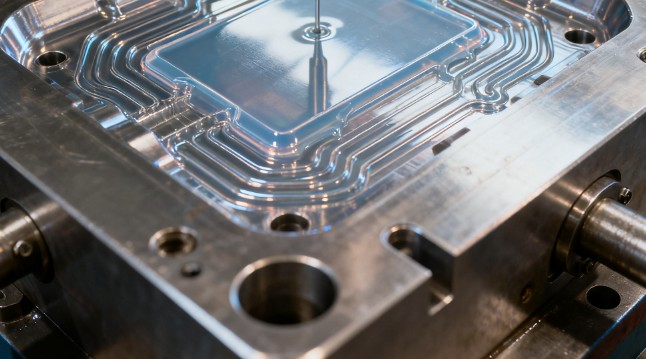
Core Structural DesignThe mold cavity is made of hot work die steel (such as H13, SKD61), with a hardness of HRC 48-52 after quenching and tempering treatment. The cavity surface is polished with a roughness of Ra 0.4-0.8μm. The cavity design adopts circular arc transitions (fillet radius ≥2mm) to avoid mold cracking and sample defects caused by stress concentration. The gating system uses a combination design of sprue + runner + ingate, and the ingate speed is controlled at 15-50m/s, adjusted according to the alloy material characteristics. The ingate speed for aluminum alloy die casting is 20-35m/s, and for magnesium alloy die casting is 30-50m/s. The cooling system adopts a circulating water channel design, with the water temperature controlled at 20-40℃. The cooling time is adjusted according to the sample thickness, generally 10-30 seconds to ensure rapid solidification and forming of the sample.
Key Process Parameter AdaptationThe mold clamping force is calculated based on the sample projected area and alloy pressure, usually 250-400MPa to ensure no mold expansion during die casting. The alloy pouring temperature is adjusted according to the material type: 650-720℃ for aluminum alloy, 410-450℃ for zinc alloy, and 620-680℃ for magnesium alloy. The temperature fluctuation range is controlled at ±10℃ to avoid sample oxidation due to excessive temperature and insufficient filling due to too low temperature. The exhaust system uses a combination of exhaust grooves and exhaust pins, with the exhaust groove depth of 0.05-0.1mm and width of 8-15mm to ensure full discharge of gas and impurities in the cavity, and the sample porosity is controlled below 1%.
Technical Trends and OptimizationCurrent die casting sample test molds focus on high efficiency and green development. Vacuum die casting technology is adopted to control the vacuum degree in the cavity at 5-20kPa, significantly reducing sample pore defects and improving mechanical properties by 15%-20%. Integrating an intelligent temperature control system linked with a mold temperature machine, the temperature difference in each region of the cavity is precisely controlled (not exceeding 5℃) to ensure sample structure uniformity. Meanwhile, 3D printing technology is used to manufacture mold cavity inserts, shortening the mold development cycle by more than 30%, and enabling complex runner design to optimize the molten metal filling path, further improving sample quality.
